

Nokia was relaunched into the market by HMD Global on 1st December 2016 running on Android OS for the first time. The brand experienced a major downfall and was eventually driven out of the mobile phone market as soon as Android and iOS gained popularity so HMD Global decided to buy the brand and launch Nokia Android. Nokia 8.1 is one of the latest phones released by the company and the brand is successful to a great extent in regaining the lost market share.
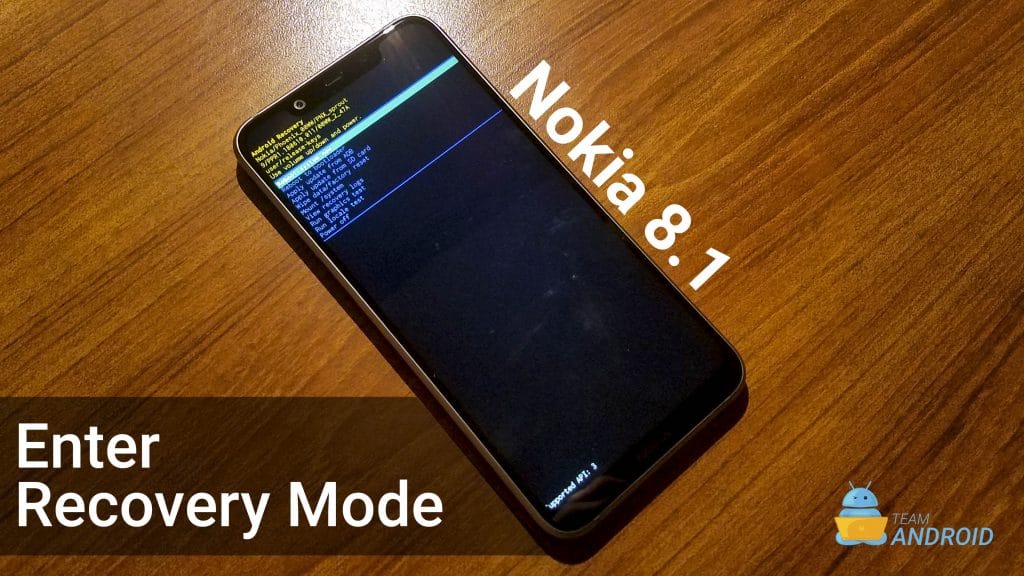
What is the Recovery Mode on Nokia 8.1?
Every Android comes with an option of recovery mode which is mainly used to hard reset the phone, flash OTA ZIP files and clear cache among other uses. Recovery modeis a hidden feature mainly because of the fact that users may lose important data if access to recovery mode is easy and prompt as they might erase data unintentionally or hard reset the device.
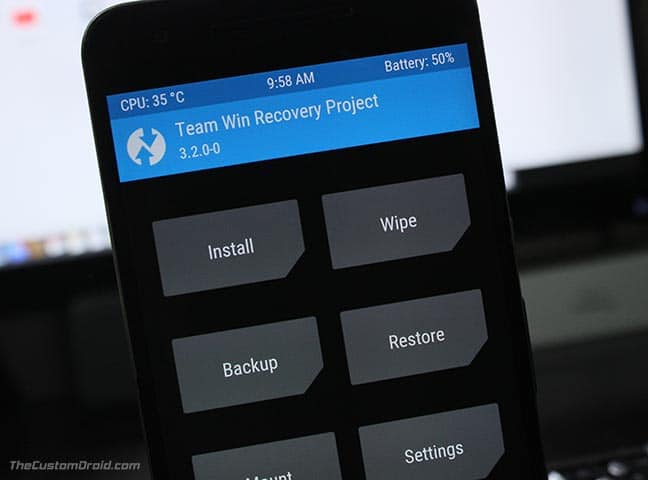
You may have seen some users installing a custom recovery like TeamWin Recovery Project (TWRP) or ClockWorkMod (CWM) but that is not a necessity. Stock recovery allows you to carry out maintenance operations but some advanced features like formatting each partition manually and creating system-wide backups are only available in custom recovery. Nokia 8.1 is an advanced device and you will probably not need custom recovery but knowing how to access stock recovery is important to ensure device smoothness at all times.
How to Access Recovery Mode on Nokia 8.1?
Every tutorial about accessing the recovery mode will not be similar because the procedure may differ from device to device. For Nokia 8.1, there are three different methods that can be used to enter the recovery mode. The pre-requisites for all methods are the same, you need a USB cable and a laptop.
We will guide you through all three steps that work on Nokia 8.1 if you want to access the recovery mode. No single method can be termed as “the best” or “easiest” because that differs from user to user. However, most of the people use the buttons method as it is technically the least technical one!
Entering Nokia 8.1 Recovery Using Buttons
As stated, you need to have your Nokia 8.1 and a laptop/desktop PC when using this method. The following 2-step procedure will lead you to recovery mode:
- Switch off Nokia 8.1 and connect to computer: The first step is to press and hold the power button and switch the phone off. Now connect your phone to your PC using a USB cable after which Nokia 8.1 will begin to charge.
- Button combination: As the battery animation shows up on screen, you need to hold volume up and power button together for a couple of seconds after which a message will pop up asking you to release the buttons in case you want to switch the phone off. Ignore this message and keep holding the buttons after which you will enter the recovery mode.
Entering Nokia 8.1 Recovery Using Android Debug Bridge (ADB) on Windows
The other method of accessing the recovery mode in your Nokia 8.1 is via ADB but the processes are different for Windows and Mac. Let us have a look at step-by-step guide on how to access recovery using ADB on Windows:
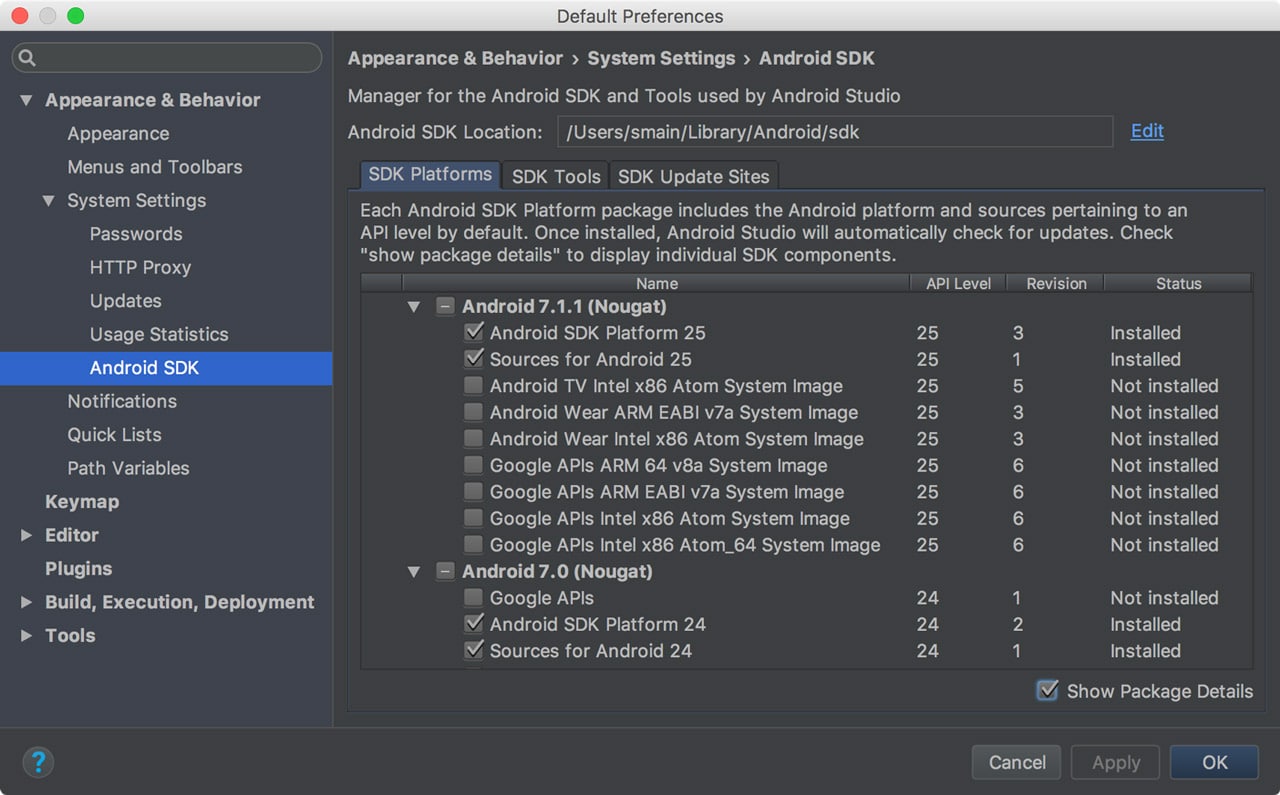
- Downloading Android SDK or SDK platform tools: On a windows PC, you need to download Android SDK from Android Developer’s website. Once downloaded, install the file on your computer. In order to set it up, you also need to download the platform-tools and USB drivers package in SDK. Alternatively, you can separately download SDK platform-tools and install.
- Connect Nokia 8.1 and open command prompt: After completing the first step, install the ADB drivers if needed as you connect your device to the PC. Now go to a directory named “ANDROID-SDK-PATH\platform-tools” and press shift with a right click simultaneously to choose “Open Command Prompt”.

- Enter command and access recovery: Finally as the command prompt opens, enter “adb reboot recovery” and your Nokia 8.1 will switch off automatically. The device will then boot into recovery mode and you can navigate using the volume buttons and select using power button.
The ADB allows the connected PC to take control of your phone due to which the device reboots and enters recovery without using any buttons.
Entering Nokia 8.1 Recovery Using Android Debug Bridge (ADB) on Mac
A lot of Mac users will find this section useful as it will teach you how to enter recovery on Nokia 8.1 in case you need to clear data or cache or perform any other maintenance activity. The first step is exactly the same as in Windows in which you need to download Android SDK or SDK platform-tools.
The next step consists of some changes in command and prompt. After you connect your Nokia 8.1 to Mac, you need to launch the Terminal app and enter “//android-sdk-macosx/platform-tools/adb reboot recovery” where refers to the location/directory where you stored your Android SDK. This means that if Android SDK is in the main user directory, you only need to enter “android-sdk-macosx/platform-tools/adb reboot recovery” omitting /PATH/
As you enter the command, Nokia 8.1 will switch off and enter into the Recovery Mode.
These are all the processes through which you can enter the recovery mode in Nokia 8.1, While many users believe that Recovery Mode is kind of a hack for tech savvy people, it is in fact important to clear cache and delete data in order to resolve issues that may arise in the phone. If you are well-versed with the stock recovery, you may consider playing with advanced options via Custom Recovery but you need to be careful. Any unwise step in Nokia 8.1 recovery can lead to unfavorable consequences and loss of data.
